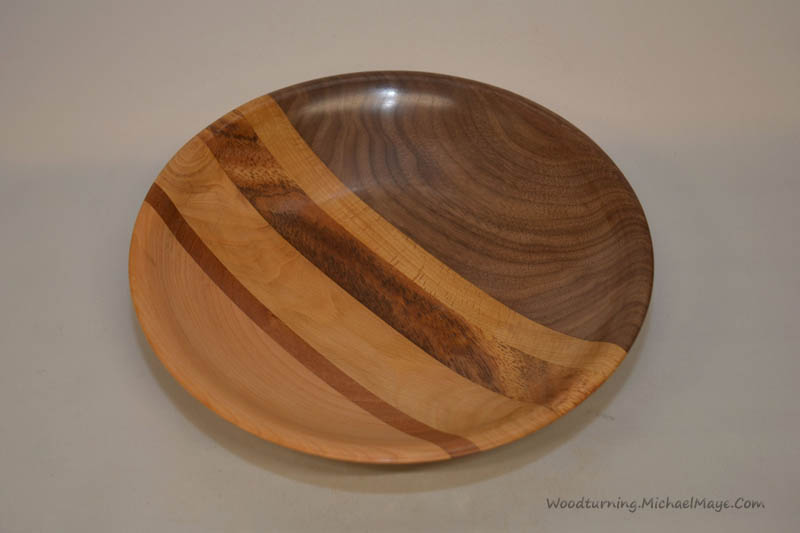
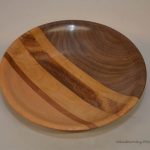
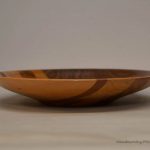
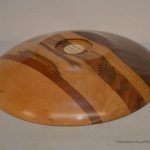
Woods used, Walnut, Cherry, Iroko, Unknown, Beech & Sapele.
I’ve watched many youtube video’s over the years on how to do a laminated platter or bowl. I’ve always wanted to try one and recently, I managed to finally have a go at making, not one, but 2, just for good measure!
On nearly all the videos I’d viewed, all the prep work was done with a planer/thicknesser (or as they say over stateside, a “jointer”). Up until recently though, I didn’t have a thicknesser. I know you don’t really need one, you could hand plane the pieces. But as I am getting a little older, I also seem to be getting a little lazier!
I came across a good deal on a planer/thicknesser online just before last Christmas. Being unable to attend last years national seminar in Limerick, I’d money that was saved, burning a whole in my pocket so the planer had to be bought! These laminated platters were the first pieces of timber put through my new planer.

Raw material
I had some off cuts of various hardwoods, stacked on a shelf ready to be used for *that* project (as I’m sure we all do!). I had some 8″ x 2″ planks of Walnut and Cherry too. With the off-cuts I had, I’d be able to make a 12″ platter and I’d still have some off-cuts left over. I decided to use both the Cherry and Walnut along with all the off-cuts, which would make 2 platters.
I decided on the layout of the various timbers and what design it would give. I first cut a 12″ length of the Walnut and 12″ of the Cherry planks. I then sliced both of these, a 5″ which left 3″. This was roughly 2/3’rds 1/3rd. I intended to use 1/3rd Cherry with the 2/3rd Walnut, and visa versa, with the other offcuts laminated in between.
I cut the stack of offcuts I had to 12″ long. I also trimmed them to 2″ to make it easier for gluing up. I left them whatever width they were. Next up to the thicknesser (which I was looking forward to!). The Walnut and Cherry, which I’d cut earlier, were good enough for gluing up, though I still gave them one pass over the planner. As all the various offcuts were off different widths, I decided they would only need a quick pass or two over the planner.
Sidenote: If you don’t have a planner/thicknesser, and are thinking of getting one, no matter what size you get, you WILL need a dust/chip extractor! Boy oh boy do they produce some amount of chips!!

Glue up
Onto the glue up. Clamps. If you think you have too many clamps, you only have half! You can never have enough clamps. I laid out all the timber on the bench. I’d intended to have both platters as a mirror or the opposite of each other, but I think I got one sequence wrong. (Its never a mistake, its a design change/feature!)
When I was happy enough with how things looked, I started to glue up all the pieces. The glue I used was Titebond 3. Although I’d bought a bottle some months previous, It was my first time using it. Everyone I’d watched that used it for laminating or segmenting, highly recommended it. I haven’t seen it for sale anywhere local, I think I got mine from Snainton woodworking supplies in England. I found the glue a little watery, but it spread quite well and there was none of that dreaded “creep” when clamping everything together.
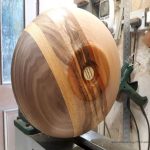
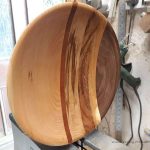
After leaving overnight to cure, the blanks were ready for turning. The blanks measure roughly 12″ x 12″. I find the centre and mark my circle and then trim off roughly on the bandsaw. I then turned and finished the platter in the usual way.
Top Tip
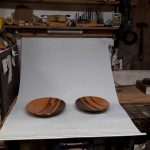
After putting so much time and effort into your turnings, you want to show them off in the best possible way. You don’t need to go to any great expense either! I use a simple roller window blind that I picked up cheaply. I have it fitted under one of my shelves over my workbench where I can roll it up out of the way. This gives a nice crisp background to show off your masterpieces. Another important thing is lighting. I use 6000K LED battens and panels for lighting in my workshop. These are quite bright and replicate daylight. The old fluorescent lighting tends to give off a yellow and orange tint, especially so in photos.

Recent Comments